In order to maintain high-quality campaign performance, you will need to monitor results constantly, have the flexibility to change your logic in real time and be able to maintain centralised control. In order to achieve this, the Fraud Shield was created within Apptrove to detect, evaluate and ultimately protect against traffic coming from Invalid and/or suspicious activity through Partner/Affiliate/Agency /UniLink traffic
This guide covers all of the steps necessary to configure/manage/optimise the fraud shield correctly.
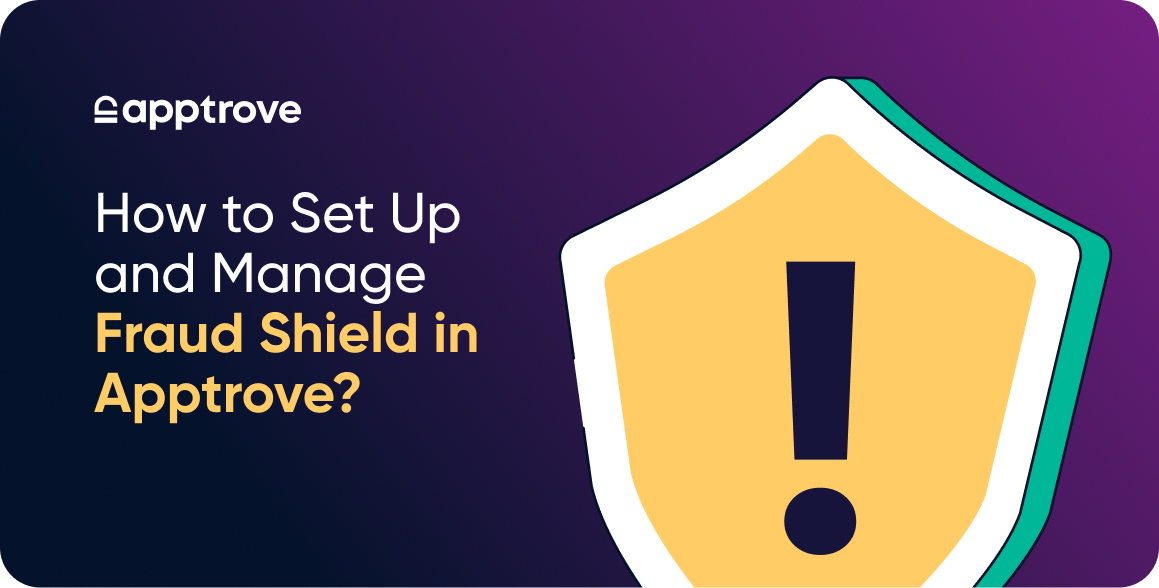
What is Fraud Shield?
Fraud Shield is Apptrove’s anti-fraud tool that scans all traffic in real time and uses rules-based logic to ensure attribution integrity.
Fraud Shield helps you:
- Identify duplicate IP Address activity
- Detect untrusted or fake devices
- Block SDK impersonation (spoofing) of devices
- Track time from install to event (ITET).
- Define your own custom filtering procedures
- Use both pre-defined
The Fraud Shield allows advertisers to set parameters for what constitutes suspicious or invalid activity and gives them the ability to respond to any detected suspicious or invalid activity immediately.
Step 1: Navigate to Fraud Shield
To use fraud shield:
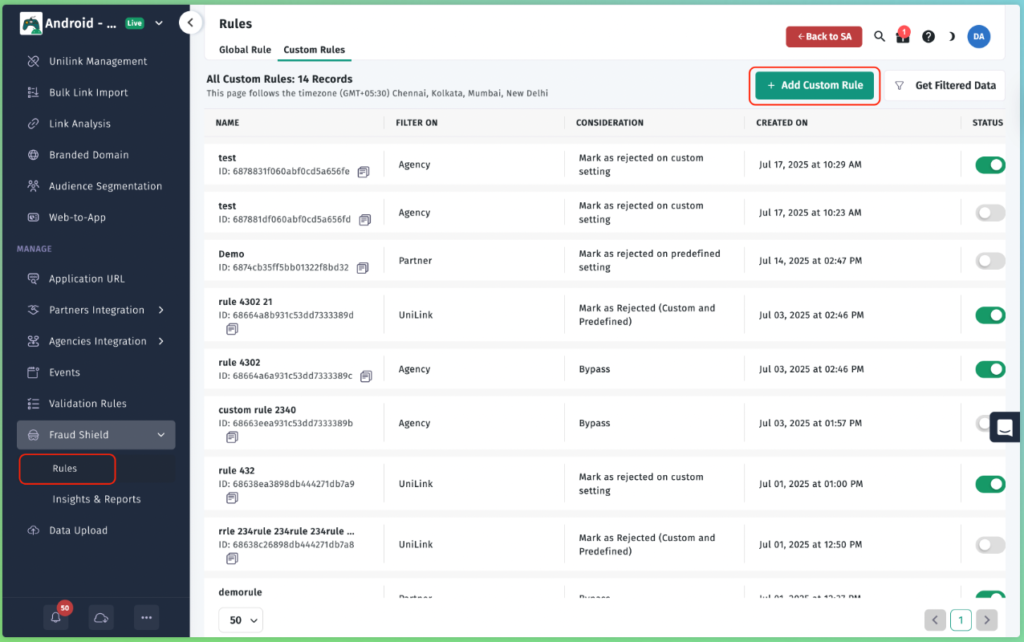
- Log in to your Apptrove dashboard, then click Fraud Shield under the left sidebar of your dashboard.
- There are two sections within fraud shield:
- Rules – configuration is done
- Insights & Reports – performance monitoring is performed
Step 2: Understand Migration of Validation Rules to the Fraud Shield
All existing validation rules have migrated to the Custom Rules Framework for fraud shield.
Migration Structure:
- Any organic traffic checks that had been processed as a validation rule have been converted and included as a standalone rule.
- Any partners who had been processing the identical logic to each other as a validation rule have been combined into a single rule.
- All partner-specific logic remains within its own rule.
- All agency-related rules have been consolidated in the same way.
Things You Need To Validate:
- No partner is assigned more than one active custom rule at a time.
- All migrated rules are logically correct.
- There is no duplication across either partner or agency configurations.
Important:
- A partner can only be included in one active custom rule at any given time.
- If there is a change in logic, you will modify the existing custom rule and NOT create a new one.
Step 3: Create a New Rule
Advance to:
Fraud Shield → Rules → Custom Rules → Adding a Custom Rule.
The Configuration is separated into distinct sections.
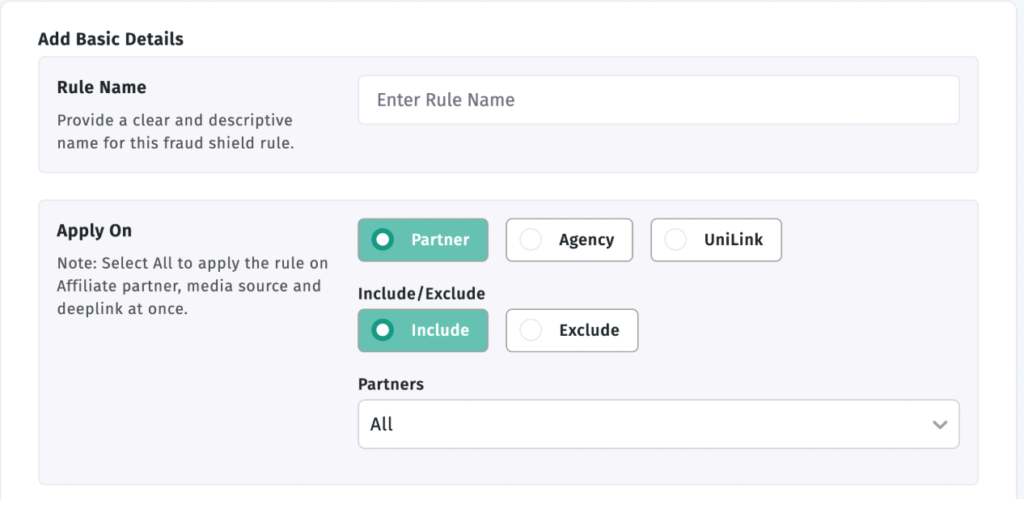
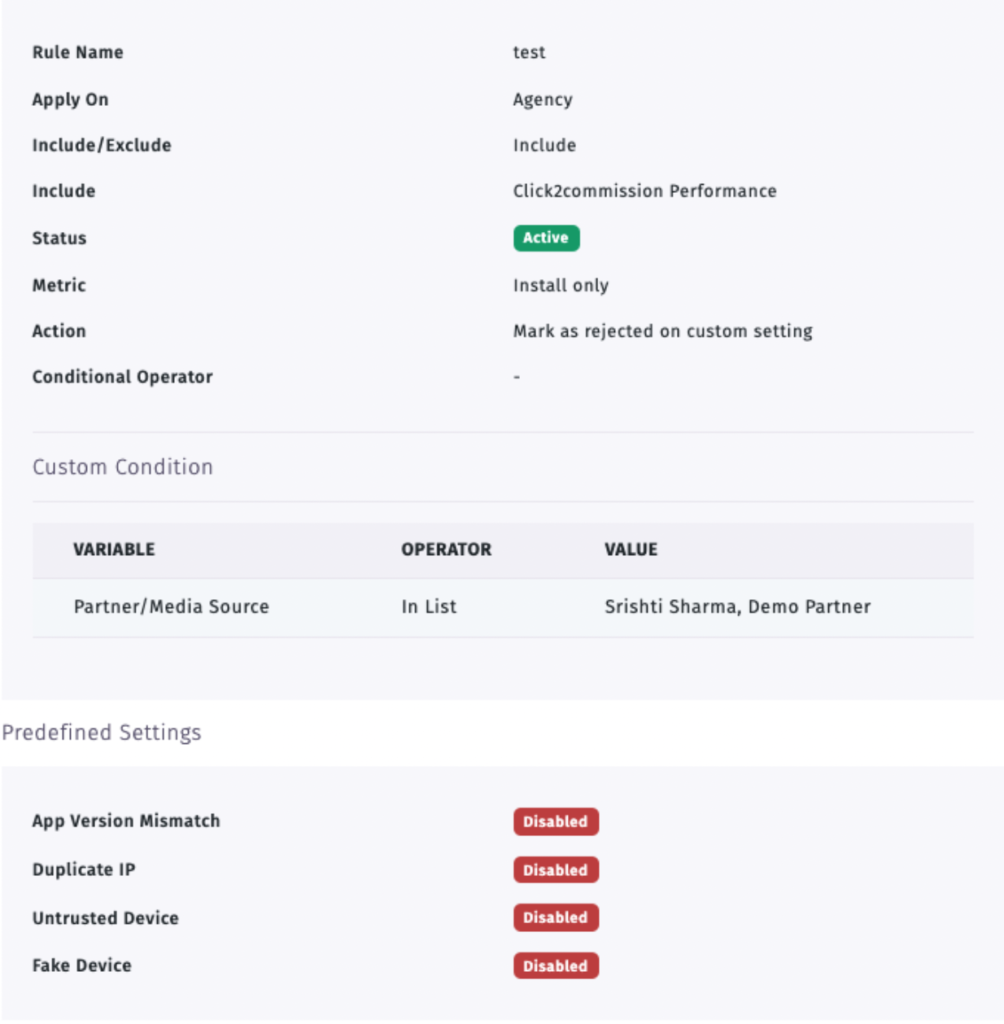
3.1 Add Basic Information
Rule Name: Create a clear and appropriate name.
Best Practice: include both the type of traffic and the condition logic.
Example: ITET < 5 Seconds – Agency – Install
This will help to manage the long-term fraud shield more easily.
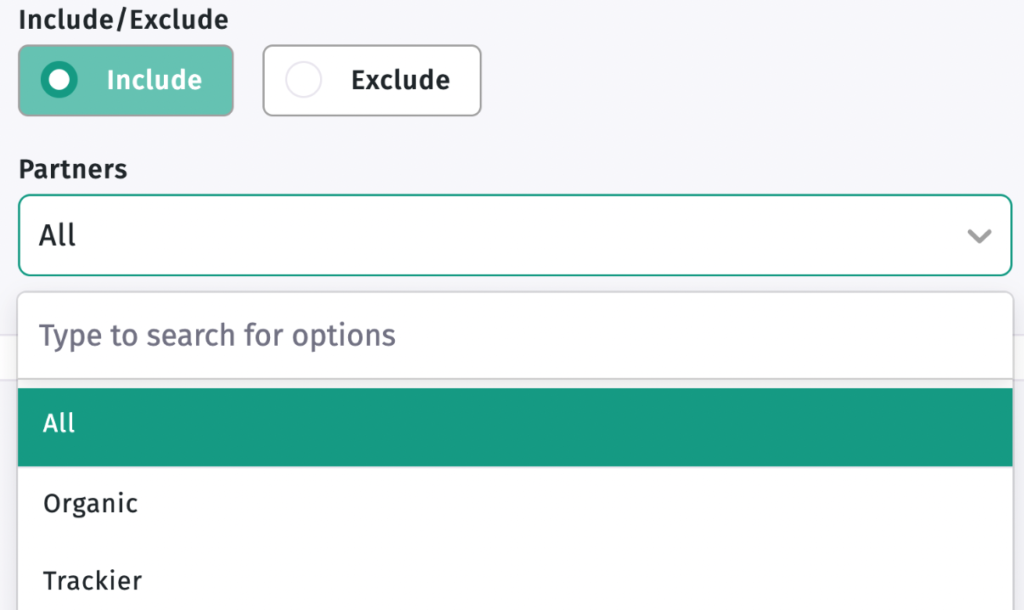
3.2 Apply To (Traffic Scope)
Select which partners the rule will affect on:
Critical Point: Double-check before you select partners, so you do not select a partner already associated with (an active) custom rule.
3.3 Events to Apply
Select the traffic events that you would like to evaluate:
- Partner – for affiliate or publisher traffic.
- Agency – for media bought through agency networks.
- UniLink – for handling deep link-level attribution.
- Install Only
- In-Apps Only
- Both (Install + In-Apps)
If you have selected the in-app option:
- Click on ‘Selected’
- Select your in-app events from your In-App Event List.
- This step is required if you want to obtain event-specific filtering.
- Confirm that the event names match what you are using to reference the SDK.
Once on Step 4, you decide how you would like to handle your traffic (the following options can be selected):
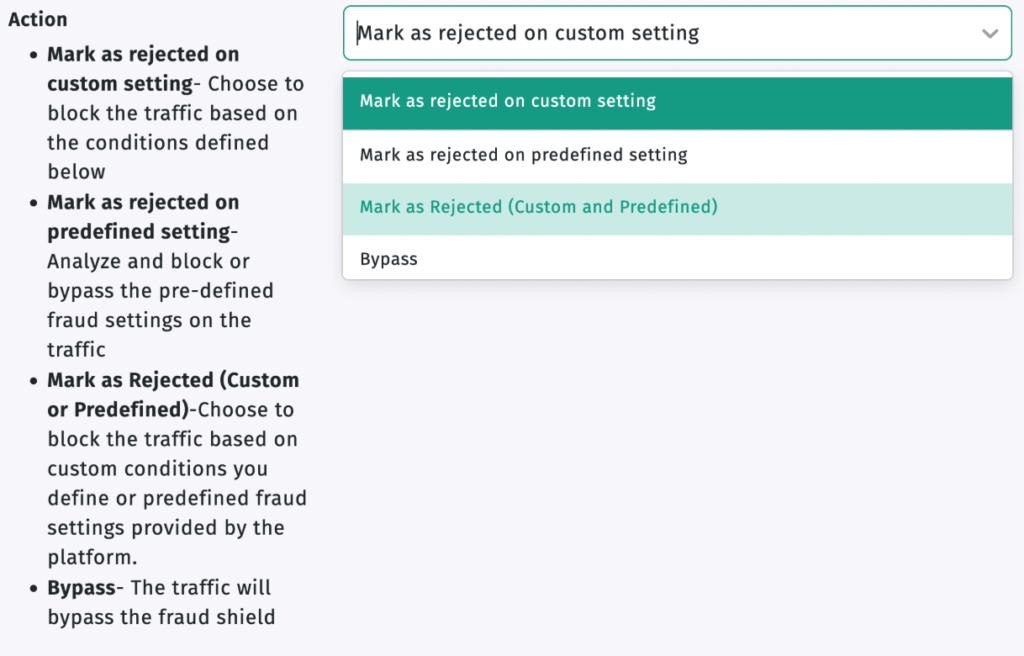
a) Reject Traffic using a custom setting
b) Reject Traffic Using Defined Settings
c) Reject Traffic Using both Custom & Predefined Settings
d) Bypass
Clarifications
- A custom Setting will be considered valid only when there are at least one custom condition.
- A Pre-Defined Setting will only be considered valid when there is at least one defined element turned on.
- Combined Settings would be allowed for each item selected in the previous step.
- Bypass may allow all traffic through without limitation; however, activity will still be logged.
- Make sure the action type you choose is consistent with the configuration logic being used to determine the appropriate setting.
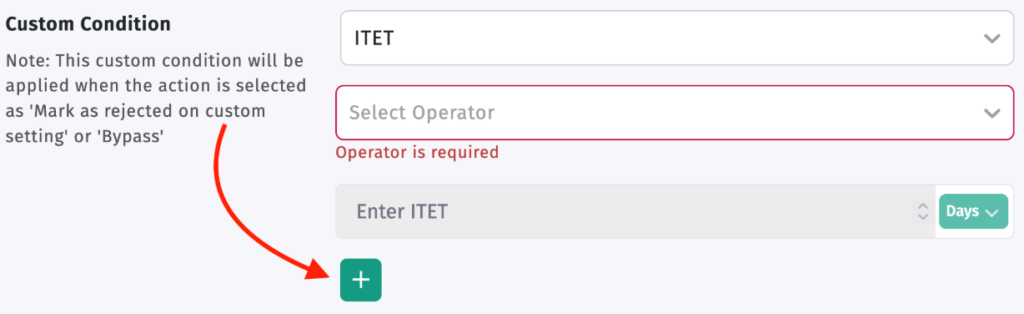
Step 5: Configure Custom Conditions
For all custom and combined actions, establish at least one condition with the following data points:
- Variable
- Operator
- Value (if necessary)
The following data points can be used as variables in determining the condition to be created:
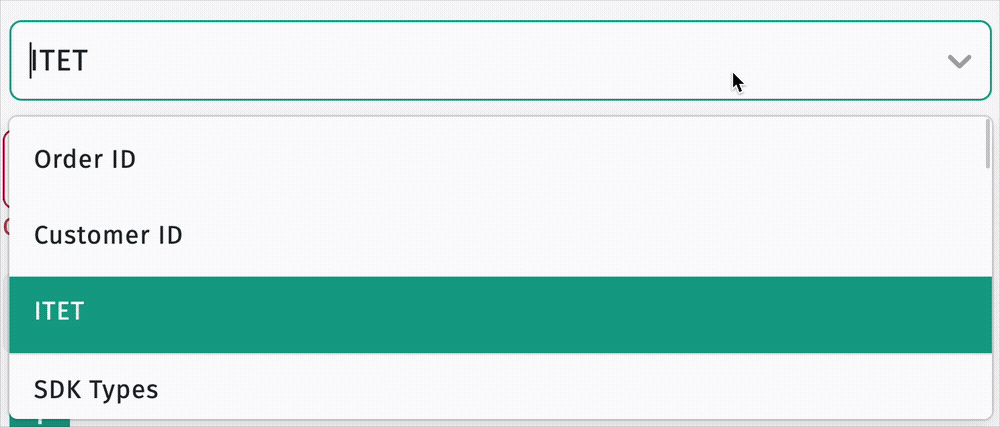
- Order ID
- Customer ID
- Customer Phone
- ITET
- SDK Type
- SDK Version
- SDK Params 1-10
- Campaign
- Campaign ID
- Ad / Ad ID / Advertiser Set / Advertiser Set ID
- Site ID
- GEO
- City
- OS Version
- App Version
The Fraud Shield will evaluate the above mentioned the fields in real time.
The operator determines how the comparison will take place:
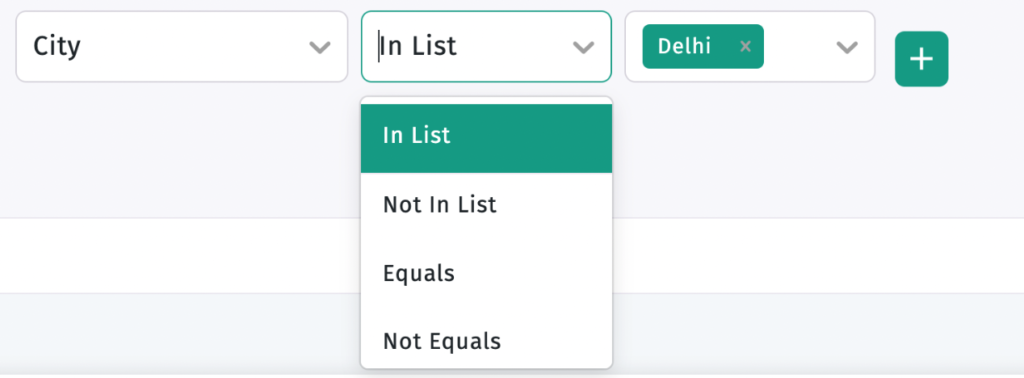
- Is Empty / Is Not Empty
- Equals / Does Not Equal
- Contains / Starts With / Ends With
- Greater Than / Less Than
- In List / Not In List
Numeric operators may only be used with numeric fields (i.e., ITET).
Adding Multiple Conditions
To create additional conditions to the rule, please select the `+´ sign. You can use the combination of both AND and OR logic in your condition combinations (i.e., tightening or broadening). Always carefully validate each of the ways the conditions are related before saving your settings.
Step 6 – Configure Predefined Settings
If you are configuring an action using the predefined or combined actions, the following built-in fraud filters must be enabled:
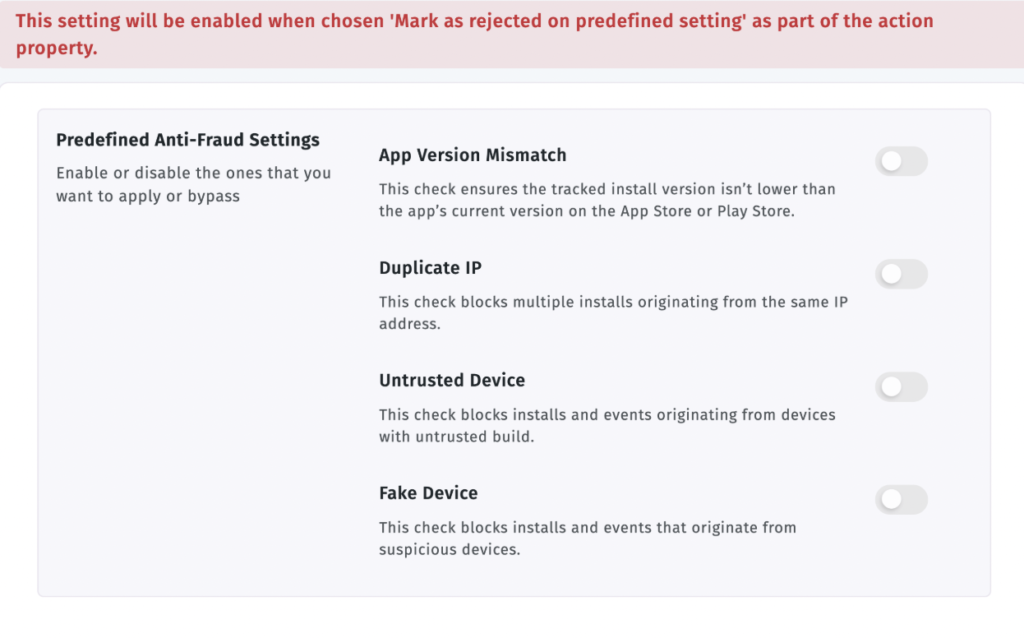
- App Version Mismatch
- Duplicate IP
- Untrusted Device, and/or
- Fake Device
If none of the toggles regarding Predefined Actions is enabled, any traffic will not be rejected. You should always verify that at least one setting is enabled.
Step 7 – Review Sidebar Summary Panel
Before saving, confirm the live summary panel on each rule to make sure that the following are accurate:
- Rule Name
- Traffic Scope
- Include/Exclude
- Event Selection
- Action Type
- Custom Conditions
- Predefined Toggles
- Status.
This will help prevent the incorrect configuration of your settings.
Step 8: Save and Activate
- Press ‘Save.’
2. Confirm that your rule status toggle is set to ‘Enabled.’ Any rule that has been saved but is set to ‘Disabled’ will not perform traffic evaluations.
Step 9 – Existing Rule Management
Navigate to:
Fraud Shield > Rules > Custom Rules
Here you can:
- Enable/Disable Rules
- Edit the Logic Behind Rules
- Identify Rule Type (whether it is Custom/Predefined/Combined)
- Identify When the Rule was Created
Continuously auditing rules will provide proper governance of the Fraud Shield.
Checklist:
- Partner overlap
- Conflicting Logic
- Disabled Rule Intent
- Migrated Rule Review
Step 10 – Insights & Reports Monitoring
Navigate to:
- Fraud Shield > Insights & Reports
- Gain refinement of the strategy by reviewing monitoring tools.
Reason-Wise Breakdown

The graphics included in this report provide an overview of fraud detected after associating attribution. This data is useful for tightening your ITET logic as well as adjusting SDK parameter validation. By using insights from previous fraud acts, you can enhance conditions related to GEO-location. The information within this section will help you to reduce your fraud risk long-term.
Steps often overlooked include the following:
- Not selecting specific in-app events when necessary.
- Selectinga custom action without conditions added.
- Selecting a pre-defined action without having the toggles enabled.
- Saving your rule in a disabled state.
- Assigning a partner that is already assigned to an active rule.
- Using an operator that does not fit the variable type (example: string versus number).
- Failing to review migrated rules before adding new rules.
- Failing to monitor insights after activation.
Final Verification Checklist
Prerequisites for configuring rules:
- Clearly-defined Rule Name
- Correct Traffic Scope selected
- Proper Include/Exclude applied
- Correct Events selected
- Action logic is correctly aligned
- Custom Conditions applied if needed
- Predefined Filters enabled if needed
- Sidebar reviewed
- Rule Saved
- Rule Activated
- After Deployment, Review Insights
Conclusion:
Apptrove’s Fraud Shield provides structured real-time fraud protection for partners, agencies, and UniLink traffic. By combining Predefined Filters and Customizable Rules, you can gain granular control over what would be classified as suspicious activity within your Ecosystem.
More than just blocking invalid installs, a properly configured Fraud Shield Framework provides accurate Attribution Protection; Improves Campaign ROI; Maintains Reporting Integrity; and Reduces Revenue Loss due to Fraudulent Traffic.
To maintain long-term effectiveness, you should:
– Audit Rules routinely
– Review Insights weekly
– Adjust Thresholds based upon Traffic Behavior
– Prevent Configuration Overlaps
– Modify Logic as Fraud Patterns Change
Accountability for Fraud Shield configuration should not stop at “configured and done.” It is important to consistently review the configuration of your Fraud Shield to ensure it aligns with evolving Fraud Tactics and the scale of your Campaigns.
Discipline in your setup, structured monitoring, and periodic optimization will make the Fraud Shield an essential component of your Performance Marketing Strategy within Apptrove.
We are delighted to have assembled a world-class team of experienced professionals who are ready to take care of your queries and answer any questions you may have.
Feel free to reach out to us at any time by emailing us at support@apptrove.com or by using the in-platform chat feature. We’d love to hear from you!